

"WRT-SIM 1.0" extension board
for WRT54G/GL
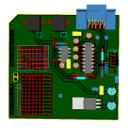
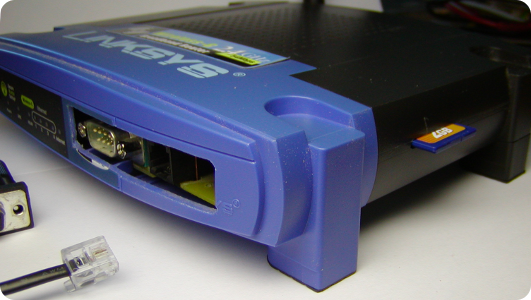
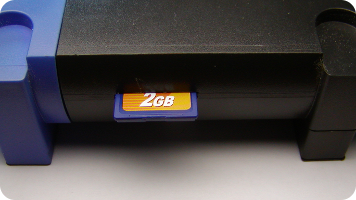
There are many pages on the Internet describing how to enhance the capabilities of a WRT54G. Some will describe how to add a RS232 adapter to a serial port, an SD/MMC card reader, or a 1-wire thermal sensor. The advantage of the WRT-SIM is that it regroups several of these add-ons on a single board and it's been designed to perfectly fit into a WRT54GL(maybe in some WRT54G(ver 4.0 and above?) and some WRT54GS too). Mine is a WRT54GL ver 1.1. All the hardware mods and softwares described below work well on it. I can't tell you about all versions as I don't own a sample of each. Check on the Internet or open the router's case. Its board has to be in 'L' as on the picture above. Did I mention that this will void the warranty?

Hardware
--> Diagram, PCB
The WRT-SIM 1.0 board has been designed with the excellent, open-source, and free software Kicad. It has been designed to be easily build: single-sided printed circuit board(PCB), widespread components.
Download the Diagram
Download the PCB

--> RS232
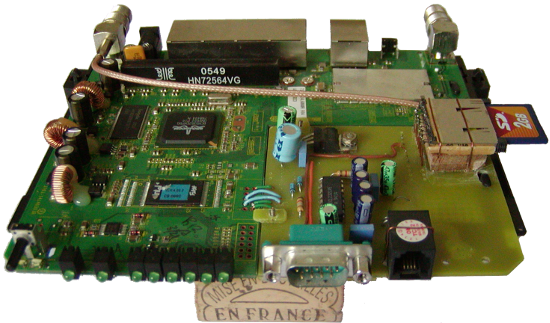
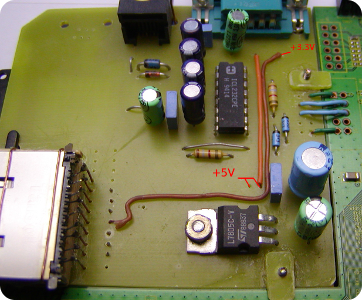
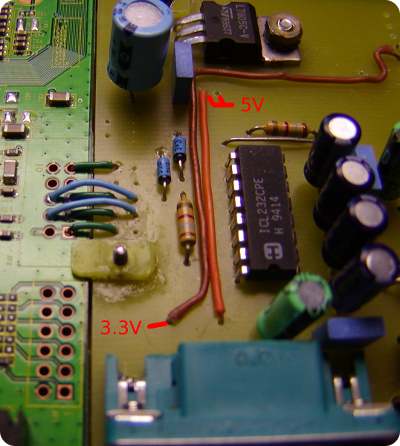 The RS232 serial line adapter can be a MAX3232(3.3V, expensive) or a MAX232(5V, much cheaper). You must put a wire to the appropriate voltage for the MAX you use. On the picture it's wired to the 5V with the orange wire. The WRT-SIM board is "stitched" to the WRT's board. Use of isolated wire is recommended.
--> SD Card
 You are free to put your card reader wherever you want. There is no specific card reader connector place on the PCB. There is however a zone with free pads to facilitate the wiring, or to solder a card directly, without a reader. The SD card is wired to the 3.3V, to 4 GPIOs(General Purpose Input Output), and twice to the ground.
The SD card reader on the picture is settled on a piece of wood. I've seen some people have soldered directly a microSD. This avoids the need for the reader but you can't remove it rapidely. On top of the board, the brown wire brings the 3.3V to the card reader. Follow the wiring mentionned on the sketch if you want to use the same(working) settings as described further.
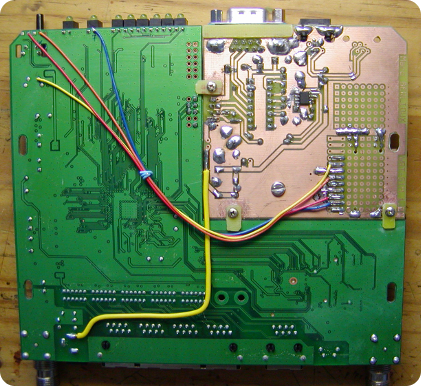 On the bottom of the board, 4 wires are connected to the GPIOs. The thick yellow wire brings the 12V from the WRT54G's power supply to the 5V regulator.
--> 1-Wire
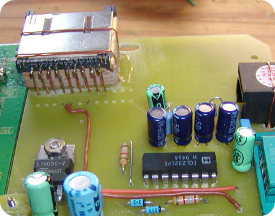
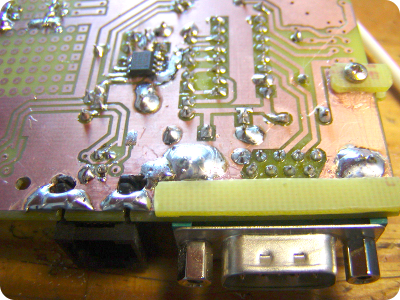 The 1-wire port uses the dedicated serial-to-1wire chip DS2480B soldered on the copper side. Electrostatic discharge(ESD) protection is due to the recommended DS9503(copper side too) but as I didn't find any yet at my retailer's, I have added pads for a 7,5V zener diode and a Schottky diode in replacement for the DS9503. Till now, with this protection, I have had no chip destroyed and no communication problem on the bus. There is room on the board for two RJ11 sockets. For those who might want to settle their own 1-wire thermal sensor mod, there are free pads nearby too.
 If you use the DS9503, you have to cut a track as shown on the left. If you use the diodes, you have to make a short circuit on the PCB as shown on the right.
--> Power Supply
 The WRT-SIM board includes a 5V regulator supplied by the WRT's 12V. It is highly recommended to insert a fuse or a fusible resistor (0.47ohm/1W) in the 12V coming from the WRT's power supply. There is enough room to put the 7805 on a cooler. This 5V is used by the DS2480B and the MAX232. The 3,3V from the WRT is supplying the SD card reader and will be used for a MAX3232 in case you choose to use it instead of the MAX232.
Firmware
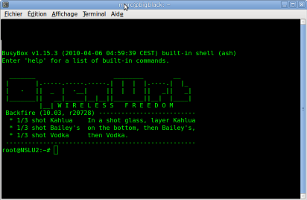
As the original firmware of the WRT54G/GL is GNU/Linux based, it can be easily adapted to fulfil the board needs. Many firmwares can run on the WRT54G/GL. All the software I describe below runs with the OpenWrt 10.03 (brcm-2.4) firmware for WRT54G. Documentation about installation on your router is on their Web site: http://openwrt.org
 OpenWrt's firmware is a very small firmware. It occupies only a part of the flash memory. The remaining flash memory is available in read-write mode for adding and updating software. After flashing, the WRT reboots and during the first boot it formats this area of memory. It can take a few minutes. Be very patient. Once done, it mounts this read-write flash memory on "/overlay" which is itself mounted over "/".
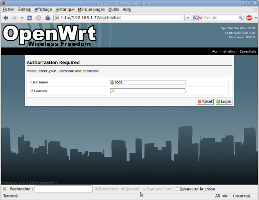
 After installation you can access to the WRT either with your web browser http://192.168.1.1, by "telnet 192.168.1.1" from a remote terminal or with a real terminal connected on the RS232 port(115200,8,N,1). Before installing software, you'll have to setup the password, the WRT's hostname, the timezone and the network. If you don't use DHCP, don't forget to setup a DNS and a gateway. This is mandatory for installing additional software from the Internet.
Software
Installing and uninstalling software can be done through the Web interface or with a command line tool: "opkg". Softwares are downloaded as packages from the Internet and installed automatically by opkg. So you have to configure the network connection first. Don't forget to setup a DNS and a gateway if you don't use DHCP. Softwares may need one or more packages. Packages with names starting by "kmod-" are kernel modules(drivers).- Web interface:
-
Web : System > Software
luci-i18n-catalan
luci-i18n-english
luci-i18n-french
luci-i18n-german
luci-i18n-greek
luci-i18n-italian
luci-i18n-japanese
luci-i18n-portuguese
luci-i18n-portuguese_brazilian
luci-i18n-russian
luci-i18n-spanish
- Command lines:
# before every packages installation,
# refresh the available softwares'list:
opkg update

# install a package:
opkg install package_name

# remove a package:
opkg remove package_name

# remove a package and orphaned dependancies:
opkg remove --autoremove package_name

# get the list of available packages:
opkg list

# get the list of installed packages:
opkg list_installed

# list a package content:
opkg files package_name

# more help on opkg :
opkg
--> RS232
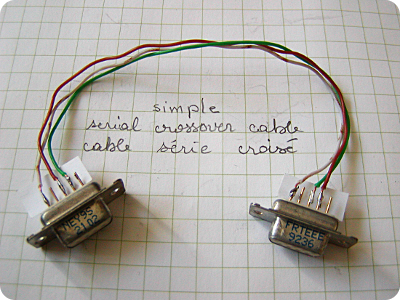
Having an RS232 port is very useful to watch the complete boot of the WRT54G. Or to access it when you have screwed up the network config. You need a terminal or a terminal software (minicom for Linux and Unices, hyper-terminal(does it still exist?) for Windows) and a cross over cable(2xDB9 female,2-3,3-2,5-5) to do so. If minicom displays an error try "minicom -s" and change its settings. Settings are 115200bauds, 8bits, No parity, 1 stop bit, no hardware or software flow control. No login or password is required.
--> SD/MMC Card
In order to use the SD card reader, you have to install some software packages. Don't put any card in the reader.# before every package installation, opkg updateKernel module for the SD/MMC mod:
# install the kernel stuff for SD/MMC
opkg install kmod-broadcom-sdhc
Kernel filesystem support(ext2 in this case):
# for ext2 (Linux)filesystem
opkg install kmod-fs-ext2
To configure the wiring, edit the file /etc/sdcard.conf:
vi /etc/sdcard.confIf you have wired the SD card as I did, it should look like the one below(I removed some unneeded commented lines...):
partition=1
mountpoint=/mnt/sdcard
cs=7
clk=3
din=2
dout=4
major=0
maxsec=32
rahead=2
dbg=0
Now we run the sdcard's startup script to check the wiring's configuration:
/etc/init.d/sdcard start
[INF] sdhc: Version: 2.0.2  Parms: major=0 din=2 dout=4 clk=3 cs=7 maxsec=32 rahead=2
[ERR] sdhc: init: No card detected
[ERR] sdhc: init: No card detected
[INF] sdhc: Module unloaded due to error
The error is normal as we didn't put any card in the reader. The wiring is correct, so it's now time to insert a card in the reader. The card must be formatted in ext2. Once it's inserted, simply re-start the startup script:
/etc/init.d/sdcard start
[INF] sdhc: Version: 2.0.2  Parms: major=0 din=2 dout=4 clk=3 cs=7 maxsec=32 rahead=2
[INF] sdhc: SD Card detected & initialized
[INF] sdhc: Assigned dynamic major number 254
Partition check:
 /dev/sdcard: p1
[INF] sdhc: Module loaded
sdcard - Card detected and initialized
sdcard - /dev/sdcard/part1 mounted on /mnt/sdcard
The card has been detected and is now mounted on /mnt/sdcard. To have it mounted at boot, you'll have to enable the startup script with the Web interface(Services>Initscripts>sdcard enable) or with the command line:
ln -s /etc/init.d/sdcard /etc/rc.d/S49sdcardThat's all for the SD card...
--> 1-Wire
A simple way to discover the 1-wire bus is to try the "owfs" tools. These tools can run as standalones (owfs,owhttpd,owftpd) or upon "owserver". owfs is for browsing the 1-wire devices as folders and files. owhttpd is for browsing the 1-wire devices with a web interface. owftpd is for browsing the 1-wire devices with an FTP client. owserver is a server and provides no interface(see below). About 300k bytes are needed for owhttpd, owftpd or owserver, 400k bytes for owfs. Installation on OpenWrt is quite easy:# before every package installation, opkg update # owfs 1-wire packages opkg install owfs # or opkg install owhttpd # or opkg install owftpd # or opkg install owserverAfter installation, you can run any of them, but only one at the time. To run another server as standalone, you have to stop the previous or it will fail without complaining at all. Hint: as servers by default run in background, a good option to add to the command line when trying them, or debugging, is "--foreground". This will allow you to interrupt a server(Ctrl-C) without having to kill it or reboot. For more verbose output, add options like: "--foreground --error_print 3 --error_level 5"
owfs - you have to specify the serial port and a folder for mounting the 1-wire filesystem tree:
mkdir 1wfiles
owfs -d /dev/tts/1 1wfiles
ls 1wfiles
owhttpd - Options for running owhttpd are similar, you have to specify a port number:
owhttpd -d /dev/tts/1 -p 3001and you'll see the result in your web browser at: http://192.168.1.1:3001
owftpd - Still very similar for owftpd:
owftpd -d /dev/tts/1 -p 55Read a temperature from a 12bits thermal sensor with wget:
wget ftp://192.168.1.1:55/28.7E6EEE020000/temperature12
owserver - To launch owserver:
owserver -d /dev/tts/1 -p 3001As i said before, owserver doesn't provide any interface. To run simple queries you'll have to install owshell:
opkg install owshelland run one of the shell commands. Now we don't specify the serial port anymore(-d /dev/tts/1) but owserver's address:port or IP:port (-s localhost:3001). Examples:
owdir is for browsing the devices tree
owdir -s localhost:3001
owread to read a temperature on a DS18B20 thermal sensor:
owread -s localhost:3001 28.7E6EEE020000/temperature12
       14.25
owwrite to set a low temp threshold on a DS18B20 to 5 :
owwrite -s localhost:3001 28.7E6EEE020000/templow 5
owpresent returns 1 if a value exist, 0 if not. To test a DS18B20 alarm:
owpresent -s localhost:3001 alarm/28.7E6EEE020000
1
In addition to respond to command line queries, owserver can feed the other servers. The advantage of running owfs, owftpd or owhttpd upon owserver is that you can run them all at the same time, owserver alone having control of the hardware. Or run them on another machine, remotely.
To run owfs upon owserver, first start the server:
owserver -d /dev/tts/1 -p 3001then owfs:
owfs -s localhost:3001 1wfilesowhttpd upon owserver:
owhttpd -s localhost:3001 -p 3002and you'll see the result in your web browser at: http://192.168.1.1:3002
owftpd upon owserver:
owftpd -s localhost:3001 -p 55and read a temperature with a 9bits accuracy on a DS18B20 with wget:
wget ftp://192.168.1.1:55/28.7E6EEE020000/temperature9To run some of these servers at boot time, simply add the necessary command lines in /etc/rc.local before "exit 0".
That's all for the owfs tools. All these tools run perfectly with the WRT-SIM board. I have put up to 10 sensors on a single bus with no power supply and some DS1990A without problem. I also tried a 15m twisted pair for connecting the sensors and they still work well.
Donations
This design work has been made with free software and runs free software. I give it for free and with no limitations. But things have a cost. Testing new hardware needs to buy spare parts, writing and translating a clear and readable documentation is long and tedious. It's why I added the splendid Paypal buttons below for those who find this work useful and can't refrain from offering me a coffee, a beer, or a pizza. Trough Paypal donations you can also contact me and get a quick reply. Thanks.| € |
Some good people from the U.S.A might also want to give some of their unused dollars:
| $ |
You feel much better when you give...
Downloads
Download the DiagramDownload the PCB